1. Created an account in Bitbucket https://bitbucket.org/
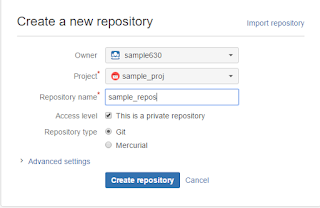
2. Created a team, project and repository in Bitbucket. Used Git as the repository type.

3. Next cloned the repository locally. I'm using Eclipse, so opened the Git repository perspective and clicked on Clone a Git repository
4. Follow the wizard. The repository URI is found in Clone section of the repository
5. Finally you'll be able to see the local clone in the file system or in Eclipse Git repository browser
6. Next right click your project in Eclipse Project Explorer/Navigator. Then Team>Share Project and follow the wizard. A new "master" branch get automatically created.
7. Next right click project. Team>Commit and follow the wizard. At the end, check the Repository Explorer
8. Edit/add a file and do local commit. Right click. Team>Commit
See the different version identifier of local and remote.
9. Now push to remote and verify again. Right click. Team>Push to Upstream. Both local and remote versions will become the same.
10. Verify the commits in Bitbucket
11. Create Developer branch
Right click the Local master and Create Branch
12. Make some modifications in branch and Commit (don't push upstream for now)
13. Merge with Local master
First make Local master the working one by right clicking and Checkout
Next goto Project Explorer and make sure the Local master is selected. Then
14. Next individually Push to upstream both master and developer branches.
For master,
For developer, first checkout. Then Goto Project explorer. Right click. Team>Push to upstream
15. Finally


No comments:
Post a Comment